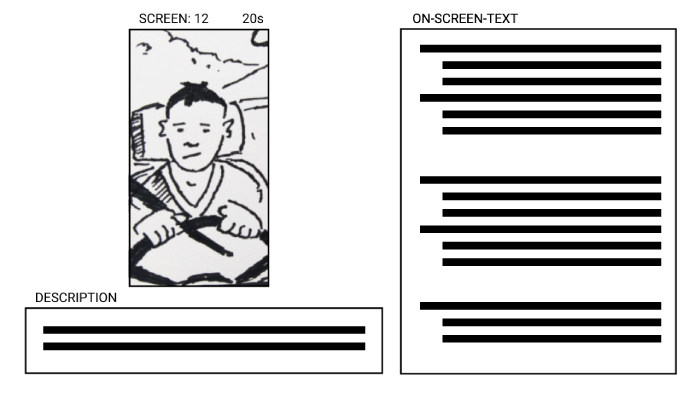
You should never start an elearning production without an approved storyboard in hand. A storyboard helps align all stakeholders to the production output expectation, quality, cost and production time. In elearning, storyboards are written in two styles. The descriptive storyboard uses text to describe the screens with only references to graphics. The visual storyboard on the other hand depicts the screens graphically showing what the final output will look like. Both styles have their own advantages. A visual storyboard will be interpreted by everyone in accordance with the screens created / shown. This post has some valuable tips that you can use for creating a great visual storyboard.
We have a post regarding the elements of a storyboard and the comparison between a text storyboard and a visual storyboard here. You should read that article if you haven’t yet. A storyboard must be so detailed that it minimizes the need of walking someone through it. Some of these tips here will apply to descriptive storyboards as well.
When do you write a visual storyboard for elearning
Visual storyboards are written for learning modules (or parts of it) that have a story, complex animations or custom interactivity. For example, scenario-based learning, animations with characters and simulations are best made with visual storyboarding. Modules that have only simple transitions and common interactive components such as drag/drop do not require visual storyboarding.
Tips to create a visual storyboard for elearning
Tools
The most common tool used to develop visual storyboards is Powerpoint or Google Slides. When compared to a word document, these two tools provide better editing features that are needed to work easily with images (visuals). Most people have access to one of these and it is also easy to export from one format to the other. These also have a comment feature that makes it easy to manage (comment and resolve) feedback for any section of the slide.Layout
A landscape layout for storyboarding helps accommodate all elements in a single slide. Within each slide, a visual storyboard has a box dedicated to visual presentation of content. This box should ideally be in the same layout as the output, i.e., Landscape for Desktop + Mobile and Portrait for Mobile only. This box is placed on the top left of the screen because the reader sees the visual first and then goes on to read the description and other details of the frame.Scenes and Shots
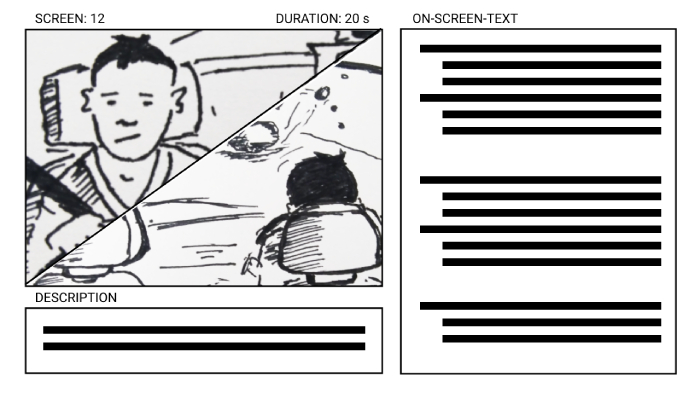
First visualize. Try to play out the full scene or the section of the module in your head in an animated manner. Then break it down into shots. Create a visual slide for each shot. Don’t make the mistake of producing one visual for the entire scene and describing all the shots in text. You may need 3-4 slides to show the individual shots to explain a scene, but don’t hesitate to use 10-20 slides if needed. It could be a bit time consuming, but the value of writing a visual storyboard really comes from describing each shot well. If the shot is a continuous one, you could break your visual into two parts diagonally to accommodate both shots on the same slide as shown here below. You must still describe the action (transition, animation) in words.Consistency in graphics style
- Take help from a graphic designer: Unless specified in the storyboard, the developer will create the animation in the style of images that you have used in a visual storyboard. For example, if you have included infographics from an image stock site, the developer will assume that these are to be used as is with minor edits. So creating consistency of art on the storyboard becomes critical as it can affect the final output. That also means that if you do not have graphic editing skills yourself, you should get the help from a graphic designer to assemble the shots and scenes in a visual storyboard.
- Send SB artwork source to production: The artwork done by the graphic designer for creating a visual storyboard must also be sent to the production team for further treatment and final use. So, make sure to keep the source files.
- Be aware of style differences: Do note that there are several styles of graphics out there from real photographs to illustrations to infographics. You will also find variations within each of these styles depending on the artist. So, be aware of these style differences as you and your designer put the visuals together on the storyboard.
- Keep references where necessary: If you choose to not illustrate a shot either because the effort is steep or if you are running out of time, you should leave references of the image that closely depict the shot along with a note. The note should state the edits needed on it to make the art style consistent with the rest.
Interactivity explanation
Scenario-based learning and simulations usually have complex logic and behavior that are not common. A developer must be able to read and understand the behavior so that it can be translated into a program. Just like the presentation of the content, the interactivity must also be validated by the SME (Subject Matter Expert). So, when explaining the custom interaction, be sure to cover all the events and logic (behavior) of the interaction for the benefit of all stakeholders, reviewers and the developer. When including interactivity, be aware of the complexity of the project. Find out what is achievable in the scope. If you do not know, ask the developer regarding the feasibility and get a confirmation from the project manager with respect to the effort.Icons, audio and messaging
If the project does not have a defined standard for icons, audio and messaging for the project, you should include them in the individual slides where they are used.
Final thoughts
An instructional designer's work on a visual storyboard can be likened to a mix of screenplay writing and direction in films. Wearing the hats of a screenplay writer and a director at the same time requires a high level of thinking and detailing. Since visual storyboards are primarily used for high end courses, it makes total sense to get into the details early and save development time and effort. Hey, and you never know, you may finally find that your true passion is in screenplay writing or film direction!


